Orbry Tile Backer Boards ideal for a variety of applications, from waterproofing walls and floors to providing thermal insulation, dry lining and tile backing. When used in bathrooms you get a tile backer board, waterproofing, and insulation all in one easy to install board! Orbry boards 20mm thick or more can also used as insulation boards and are the easiest solution for insulating and waterproofing a room in one quick and easy install.
Orbry Boards are insulated backer boards that are reinforced with glass fibre. The top coat on both sides of the Orbry Board is made of polymer-modified cement. Orbry boards provide a solid, waterproof layer to tile and are a cost effective way of insulating internal solid walls and creating a moisture barrier. They are also ideal for creating a fast track, insulated, low weight and height floor tiling system without screeds. The Orbry board absorbs the lateral movement and stops your tiles cracking and deforming over time.
We routinely see Orbry Boards used as waterproof tile backer boards, electric underfloor heating insulation and in wet room construction. They can also used for dry lining and insulation of cellars and loft conversions, as well as rigid partition wall boarding too. Here at The London Tile Co we stock all sizes of Orbry Boards in thicknesses ranging from 6mm up to 50mm.
Features and Benefits of Orbry Tile Backer Boards
How to install Orbry boards
Fixing Orbry boards to timber floors
- Fix and level any loose floor boards. Floors must be stiff with minimum deflection under load.
- Spread a coat of rapid-setting cement polymer modified adhesive onto the floor and lay the Orbry Boards into the adhesive. Then mechanically fix with Orbry Stainless Steel Screws and Orbry Backer Board Washers. Boards should be laid in a broken bond pattern.
- When fixing to dry areas, apply Orbry Self Adhesive Scrim Tape to all horizontal and vertical joints using a thin layer of cement based tile adhesive and a float trowel.
Fixing Orbry boards to sand, cement screed or concrete floors
- All surfaces must be of good quality, sound, flat, clean and free from dust and other contaminants including paint.
- Apply a suitable flexible cement based adhesive ensuring no voids are left underneath and the boards and sub floor are 100% in contact with the adhesive. New sand and cement screeds need to have cured for at least three weeks and concrete floors for at least six weeks. Boards should be laid in broken bond pattern.
- When fixing to dry areas, apply Orbry Self Adhesive Scrim Tape to all horizontal and vertical joints using a thin layer of cement based tile adhesive and a float trowel.
Fixing Orbry boards to calcium sulphate (gypsum based) screeds
All surfaces must be of good quality, sound, flat, clean and free from dust and other contaminants including paint. When fixing with cement based tile adhesives, the floor will need considerable preparation to ensure that a good bond is achieved. Please contact the adhesive manufacturer to obtain the correct specification.
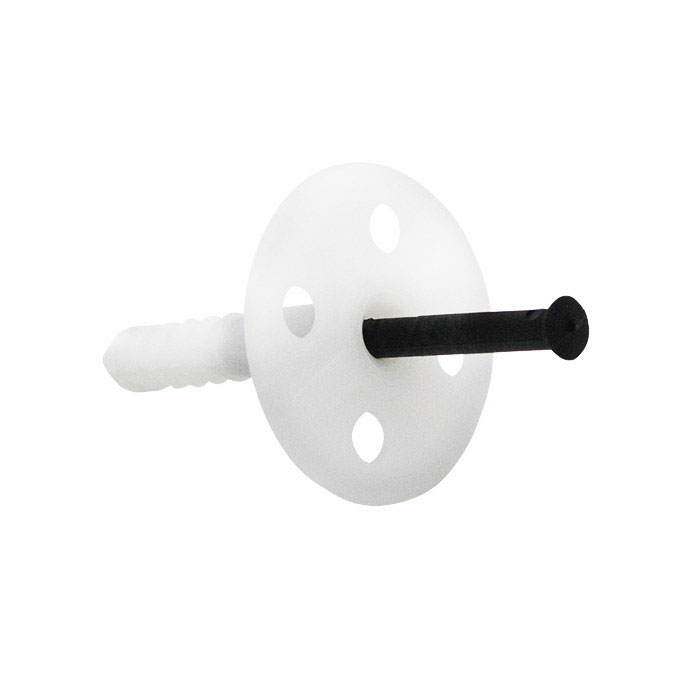
Alternatively, fix Orbry Boards using Orbry Spanker Dowels.
- Using a 10mm drill bit, drill through the board to a depth equal to the length of the Orbry Spanker Dowel.
- Insert the Orbry Spanker Dowel into the hole and tap in the securing pin until the board is held in place.
- Drill additional holes every 300mm and loose fit with Orbry Spanker Dowels.
- Fit adjacent boards using same method and check for trueness.
- Hammer in all fixing pins until the Orbry Spanker Dowels are all securely fixed. Do not over-hammer the dowels or they will crush the boards. Orbry Boards should be laid in a broken bond pattern.
Fixing Orbry boards to solid walls
Good quality sound plaster can only bear a maximum weight of 20kg/m2. This is insufficient to bear the weight of Orbry Board and tiles when fixed. Therefore, either remove all the plaster to return to an underlying sound load-bearing surface, or mechanically fix through the plaster into the underlying sound load-bearing surface using Orbry Spanker Dowels. The Orbry Spanker Dowels must penetrate the load bearing surface by a minimum of 35mm.
Existing tiled surfaces need to be mechanically fixed through the tile and back to an underlying sound load-bearing surface using Orbry Spanker Dowels. The Orbry Spanker Dowels must penetrate the load bearing surface by a minimum of 35mm. Alternatively, remove the tiles and adhesive and return to the underlying sound loadbearing surface. All wall surfaces must be load-bearing, sound, clean, and free from dust and other contaminants including paint. Walls must be flat and even.
Fixing Orbry boards with tile adhesive to brick, block, or concrete walls
- Apply a suitable flexible cement based tile adhesive with a trowel with a minimum notch of 8 x 8mm. Notches of up to 20 x 20mm may be used if the wall has minor irregularities.
- Fix direct to the wall and adjust to ensure boards are perpendicular.
- Butt joint adjacent boards.
Fixing Orbry boards with mechanical fixings
- Offer the board to the wall, and using a 10mm drill bit, drill through the board to a depth equal to the length of the Orbry Spanker Dowel that you are using. Insert the Orbry Spanker Dowel and tap in the securing pin until board is held in place.
- . Drill additional holes every 300mm and loose fit with Orbry Spanker Dowels. Fit adjacent boards using the same method and check that they are level.
- Hammer in all fixing pins until the Orbry Spanker Dowels are all securely fixed. Do not over hammer the dowels or they will crush the boards.
Fixing Orbry boards with dot & dab fixing
- Drill the board with a 10mm masonry drill at approx 600mm centres for 20mm thick boards (6 holes for a 1200mm board or 10 for a 2400mm long board), or 300mm centres for 10mm/12mm thick boards (15 holes for a 1200mm board or 27 holes for a 2400mm long board).
- . Apply dabs of suitable cement-based adhesive to the back of the board where the drill holes are located. The adhesive thickness should not exceed 30mm and the dabs should be a minimum diameter of 120mm.
- Offer up the board to the wall and push firmly before adjusting with a level to ensure it is true and level.
- Allow the adhesive to dry, then drill through the existing holes to the depth of the Orbry Spanker Dowel, insert the dowel and fixing pin and hammer in. The Orbry Spanker Dowels must penetrate the load bearing surface by a minimum of 35mm.
- When fixing to dry areas, apply Orbry Self Adhesive Scrim Tape to all horizontal and vertical joints using a thin layer of cement based tile adhesive and a float trowel.
Fixing Orbry boards to stud walls
- Fix vertical studs at 600mm centres for 20mm or thicker Orbry Board, or 300mm centres for 12.5mm and 10mm thick boards.
- Make sure all board edges are supported with noggins.
- If boards are being used in wet areas, fix with Orbry Stainless Steel Screws.
- Always use Orbry Backer Board Washers.
- When fixing to dry areas, apply Orbry Self Adhesive Scrim Tape to all horizontal and vertical joints using a thin layer of cement-based tile adhesive and a float trowel.
TILING
Orbry Boards are the ideal surface to tile on. They bond with all proprietary tile adhesives, so all you need to do is choose the correct adhesive for fixing the ceramic or natural stone tiles. If in doubt seek further advice from the tile adhesive and grout manufacturer.
Don’t forget that for a wet area installation you need to achieve a solid bed of adhesive, ensuring no voids are left beneath the tiles. The maximum combined weight of tiles, adhesive and grout that the boards can hold is 60kg per square metre, (fixed to the wall) which is more than enough for all tile and stone finishes.
PLASTERING AND PAINTING
Follow the plaster manufacturers’ recommendations for priming a cement-based surface and apply a skim coat. Once completely dry the plaster can be decorated.
CUTTING AND HANDLING
Orbry Boards can be cut easily with a utility knife. Even the largest boards weigh less than 10kg and can be handled and fixed by one person. The cut edge of a board can be rough, so suitable gloves should be worn.
Click the links below to see the technical specifications and user guides for this product.
Delivery Times
Delivery times for all delivery services are Monday to Friday (excluding Bank Holidays) 8am - 6pm. A 'working day' is Monday to Friday, excluding bank holidays. Weekends and bank holidays do not count as working days.
Delivery Costs
For information on delivery costs, please visit the main Delivery page.
Delivery Damages
It's important that you indicate the damages on the delivery note when you sign for the goods. Notify The London Tile Company by calling our advice line on 0333 320 80 48 if there are any damages or irregularities to your order within 24 hours of delivery.
1 Review Hide Reviews Show Reviews
-
Easy to use
Better and cheaper than other boards. Easy to cut down. Will use again


